- Level: 36~42 (characters above lvl 42 can not take this quest)
- NPC: Inspector Adler, near the entrance to The Einhasad Temple in Gludin
- Type: 1-time / Solo
- Time Limit: 60 mins
- Rewards:
Pailaka Earring – D-Grade. 43 MDef. MaxMP +20. Cannot be dropped, traded or enchanted.
Pailaka Ring – D-Grade. 29 MDef. MaxMP +15. Cannot be dropped, traded or enchanted.
810.000 XP, 50.000 SP, Vitality Points
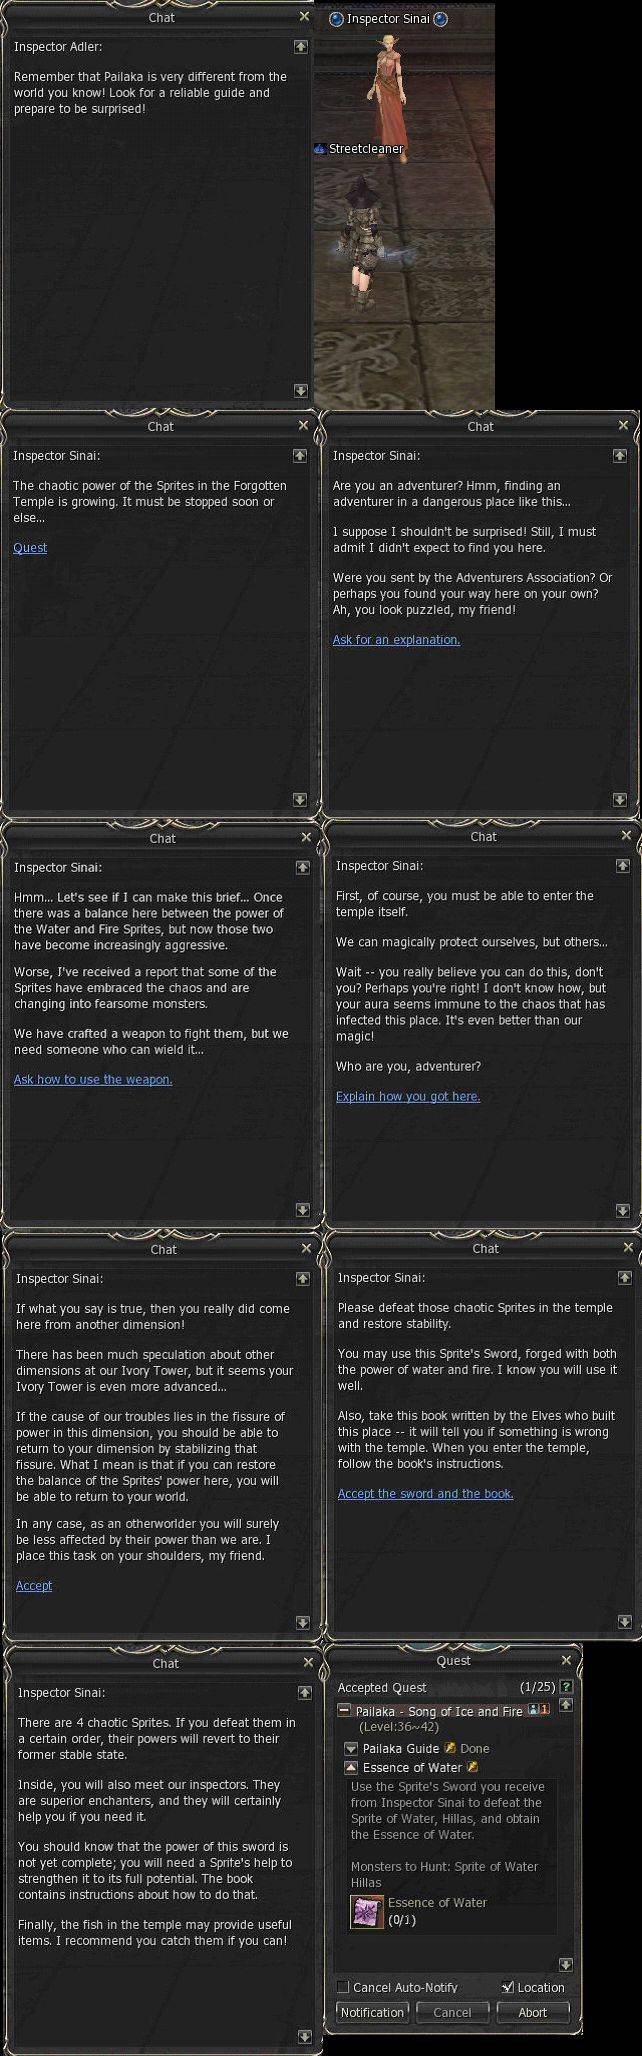
This quest starts next to the Church in Gludin with Inspecter Adler. Before talking to the NPC and starting the quest make sure that you are ready to go, as answering the final NPC dialog ("Accept the challenge of Pailaka") will teleport you immediately into the instance dungeon. You have 60 minutes to complete the quest before you are forced out. There should be enough time to kill everything in the dungeon if you want, although it is not necessary. Doing this can take almost the entire hour, so be sure to refresh your newbie buffs immediately before starting.The dungeon has the exact same layout as the normal Forgotten Temple. You start at the bottom of the entrance stairs where the mural is that seperates the Fire and Ice sides. Your map shows your world location exactly as if you were in the Forgotten Temple, except no one else will be there. If you attempt to exit the dungeon via the stairs that normally take you outside, you will be automatically teleported back to your start location at the bottom of the stairs as soon as you reach the top. NOTE: The NPC will not allow you to do this quest if you are over Level 42 when you talk to them. I tested this instance several times with both light and heavy armor melee characters. The XP/SP rewards shown are from the live server, although I did the majority of my testing on the Gracia part 2 PTS. 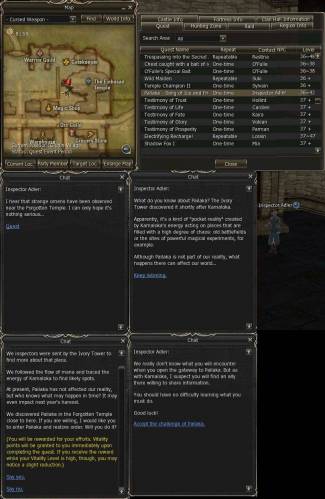
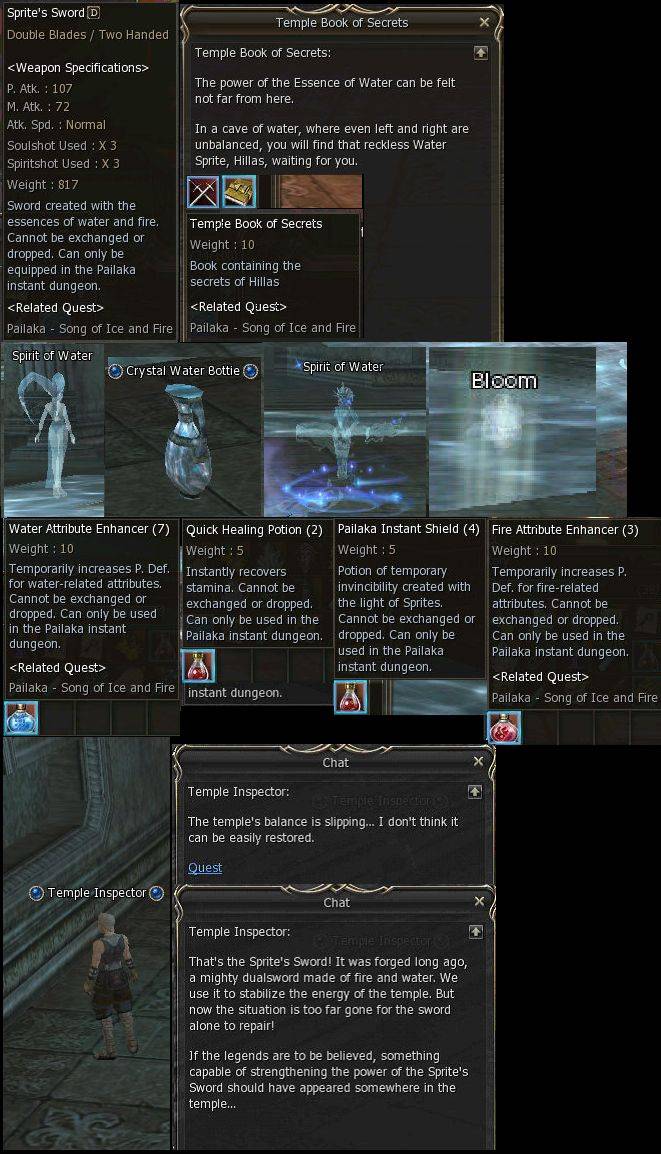
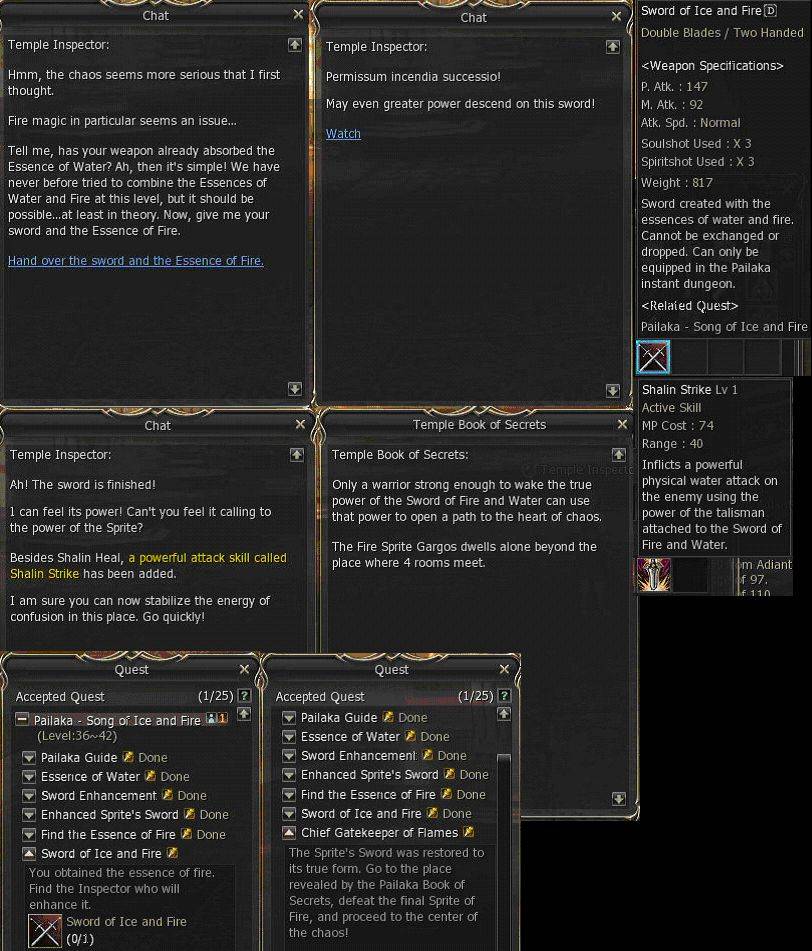
After arriving in the dungeon, turn around to face the mural. NPC Inspecter Sinai will be standing here. Talk to her to recieve a dualsword, a quest item book and to update the quest objectives. The dualsword is D grade even though it is a Stormbringer * Samurai Longsword dual and it has altered stats, with increased Matk so it is useful even for mages. The sword will be upgraded as you kill the bosses in the dungeon, so although it has top D stats to start with it does get better. It does not get an SA and it remains D grade after each upgrade even though it gets into C grade stats. You don't need to use the sword to kill anything in the dungeon, but you may need to equip it to get some bosses or mobs to 'stick around' for you to attack them. (Like if you jump ahead to a boss before updating the quest at a NPC.) Sinai gives you your first target, Sprite of Water Hillas. This is important as you *have* to kill the bosses in order to complete the quest. Bosses will either never appear or disappear as soon as you get close to them if you do them out of order or don't update your quest after killing each one. Thus the path you will take through the temple is pretty much a straight loop from water side to fire side, taking the side areas for mobs or bosses with a single backtrack for the final boss at the end. 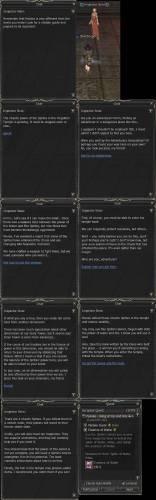
Taking the left hand path and entering the water side of the temple you will be presented with 1-6 mobs in a room although most will have 2 or 4 per room. You will also find 1-2 targetable items and a single possibly "Bloom" mob in the circular connecting rooms. (The Bloom mob does not always appear.) This setup is mirrored on the fire side of the temple as well. The majority of mobs on either side are named Spirit of Water/Fire and only come in two variations with the same name. They are social + aggro and only drop HP and MP herbs, none of them drop adena or buff herbs. They are all 1x mobs with no other special attributes, although they have a secondary ranged water or fire spell attack. All of the bosses are aggro, have high HP and are "Resist Hold", and some are "Light Armor" types in addition. The targetable items (Crystal Water Bottle and Burning Brazier) can be 'broken', although they don't attack or explode, in one hit for a special palaika item drop. These potion drops appear to be stacks of 1-10 each. You can get Quick Healing Potions, Instant Shield potions, or a Water/Fire Attribute Enhancer. The attribute enhancer matches the side of the temple they are on. The single 'Bloom' mob on both sides of the temple is non-aggro and is the exception to the rule, by possibly dropping a potion as well as herbs. None of the mobs will respawn while you are in the instance. (Note: From talking with other people online, it appears the mob respawn timer is the same as the instance duration. Thus if you reenter the instance before the intial timer resets, mobs will still be dead. This may be dependant on the level of the Pailaka however, and I have not yet confirmed how the respawning/resetting of the Pailaka works entirely.) The quick healing potions work pretty much like regular QHP's. Instantly restoring around 400hp. The Instant Shield potions provide a roughly 3 second "Invincible" buff. (Just like the high level skills.) The attribute enhancer potions are 10 minute buffs that add 30 to your Fire/Water defense attribute. You can only have one active at a time, using the opposite potion will cancel and overwrite the current one. Note however, that these potions cannot be used outside of the pailaka instance. The sword isn't equipable outside the dungeon either and it will automatically unequip if you leave the instance due to timing out, disconnecting or just leaving early. All mobs including bosses will respawn if you exit the quest prematurely, but you keep any sword upgrades you have made. Just talk to the quest starter again to re-enter the pailaka and make another attempt. Also, there are "Temple Inspecter" NPC's stationed at various intervals throughout the temple. Usually in a room just near or adjacent to a boss. Just like regular NPC's talking to one is the same as talking to another. You talk to them to update your quest as you kill the bosses. Basically, you kill mobs to heal your HP/MP with herbs and loot potions to help you kill the bosses. Rinse and repeat talking to the NPC's between bosses. The first Temple Inspecter you meet will be facing the wall that the first boss is on the other side of, in the next room. Be sure to talk to him to update your quest before attacking the boss. Hillas, and the other mini-bosses all have enhanced HP and some active skills that they intermitently use. (Hillas has sleep as well as the water/fire element attack all the bosses have.) Melee chars may have this the easiest, as with the newbie buff VR and shots, the bosses pose almost no threat to your HP. If you don't have VR or are a nuker, be sure to gather as many of the Pailaka healing potions, shields and attribute potions you can to help yourself kill the bosses. It takes roughly a minute or three as a melee to kill a boss, depending on your class and which of the 5 bosses you are fighting. 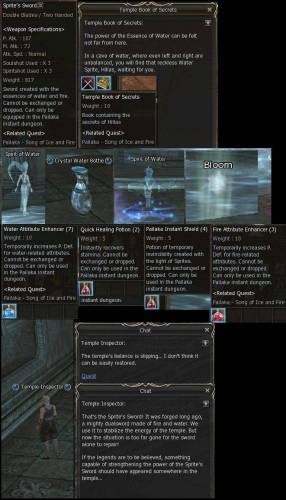
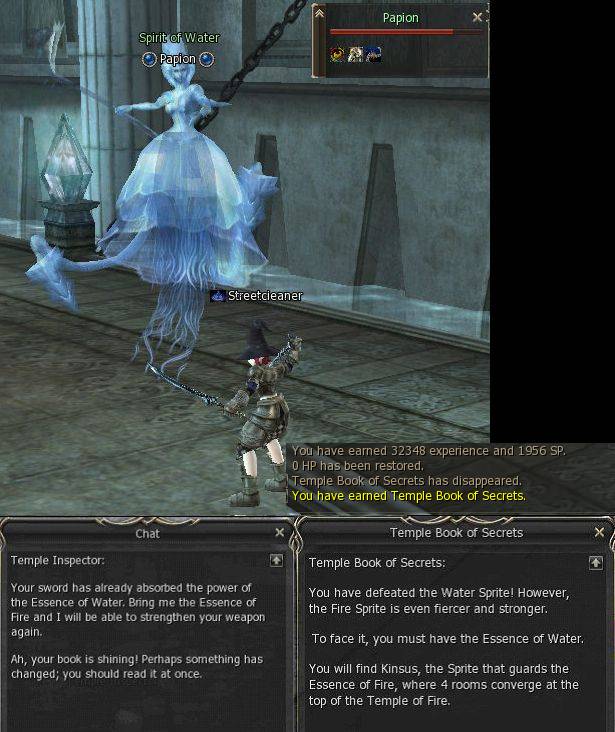
After stocking up on potions, and talking to the NPC to update the quest, go ahead and fight the first boss in the room the first Temple Inspecter was facing. This will give you a good idea of how hard the rest of the temple will be. The later bosses have slightly stronger special attacks and a bit more HP/def, but otherwise they are fairly basic fights. Once you have killed Hillas, exit the room and talk to the Inspecter NPC again. He will strengthen the special duals and it also then allows you to use a special "Shalin Heal" skill. This spell works much like battle heal quickly restoring HP. For melee chars, this can take a bit to cast however, since it is a spell. 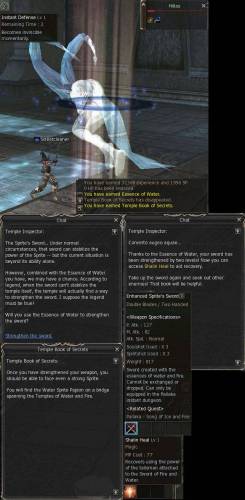
With your newly boosted sword, continue on through the temple. There is only one 'main' path with side rooms, so it's hard to get lost even if you haven't been here before. You should shortly come to the next boss Papion as she is on the main path through the temple and not in a side room. This boss will be standing on a bridge over some water. Be sure to note the location of this room, as you will have to come back here for the final boss. Papion has the the light armor attribute, and there will be a few mobs nearby, although they are not minions. Kill her much like you did the previous boss. Once she is dead, cross the bridge and enter the next room to find another Temple Inspecter NPC to update your quest log. 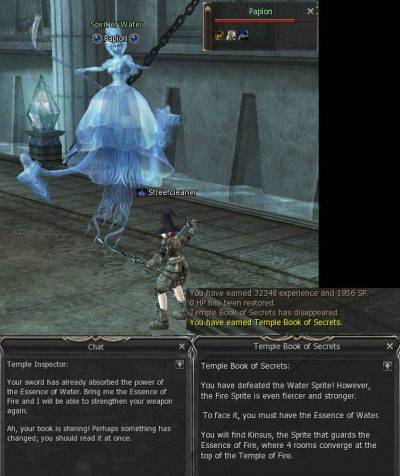
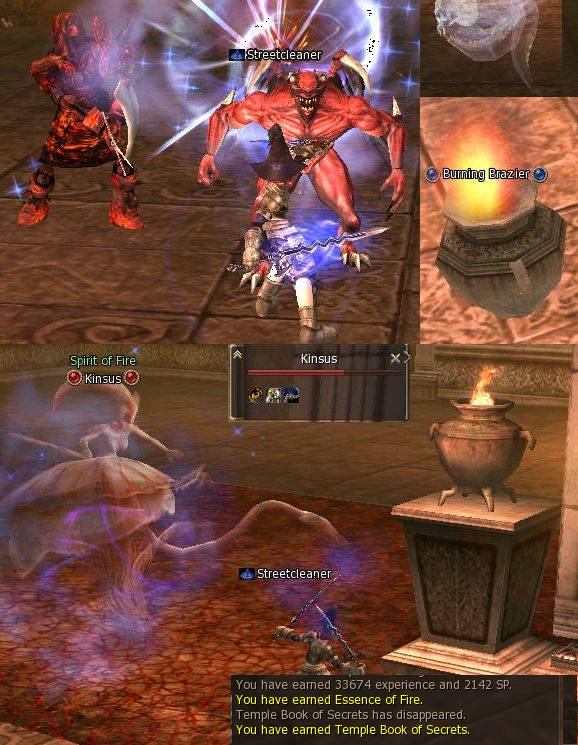
You are now leaving the water side of the temple and entering the fire side. The mobs names all change, but otherwise they all act and behave the same. You will find another Temple Inspecter here, as well as the next boss Kinsus, who is in the side room room you would pass through to reach the Fire Salamanders if this was the regular Forgotten Temple. (Be sure to pass through the 'loop' at the back of this room to find a few more Burning Braziers to loot.) 
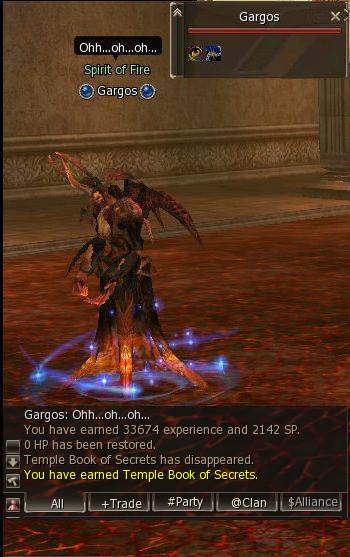
After you defeat Kinsus, head back to the Temple Inspecter to update your sword again and gain access to the physical attack skill "Shalin Strike". This skill does a respectable amount of damage, but it isn't necessary to kill the bosses. Strengthening the sword also updates your quest log for the fourth boss Gargos. Gargos will be in the long double wide hall-like room on the same side of the main corridor as Kinsus was. All the rooms on the left hand side (if you are running straight through the temple from the starting location from water to fire side back to the entrance.) are normal mob rooms. 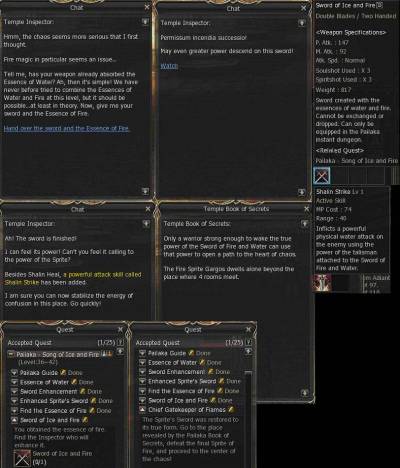
Again, Gargos is just slightly tougher than the previous boss, but he will drop before too long. If you are a mystic, he may be the first boss you really want to be sure to have a fire attribute enhancer potion active for. (He has one visually nice area Fire attack, although my melee characters didn't recieve any significant damage from it.) After he is dead, talk to the Temple Inspecter NPC one last time before heading for the final boss. You can also explore the last few rooms that head back to the entrance for a few more mobs to kill and some Braziers to break. (Including two braziers 'underneath' the walkway closest to the entrance room where 6 Fire Spirits are clumped together.) If you are running short on time, you may want to skip those last few rooms and head directly to the last boss instead. 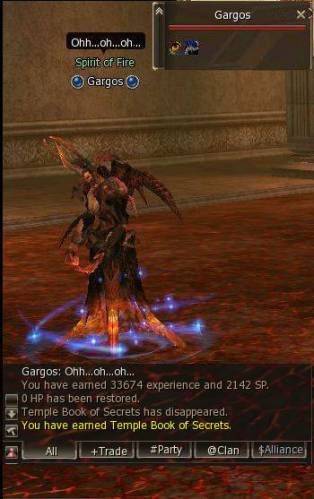
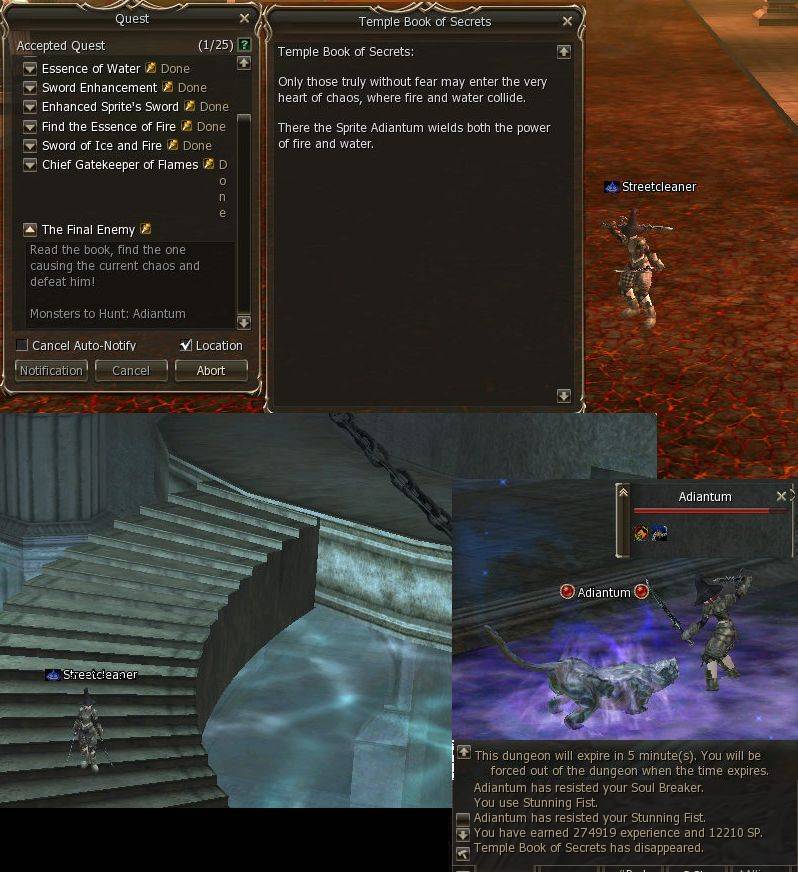
When you are ready, head back towards the bridge over water where you fought the second boss Papion. Facing the water side of the bridge, to the left had side you will notice the arch of a passageway under the water. This is where you need to go for the last boss. The water portion is very short, being just a corner to take before taking some steps out of the water and immediately entering the boss room. The boss Adiantum is here as well as two last Spirits of Water. The room is a short rectangle, with you entering on the far left of a long side. The boss is usually fairly near and will aggro you quickly while the two spirits are usually on the far right end of the room away from you. Adiantum has fairly strong special attacks, so if you have potions and shields, this is the place to use them up! Although again, melee chars with VR will have an easy time of this. The boss should die in only slightly more time than the other four. The first time I fought him with 5 minutes to go before the instance would have kicked me out, and did so easily. The second time I had more time, but I refreshed my newbie buffs to soon before entering and they faded while I was fighting the boss, although this didn't make the fight much harder overall I did have to use up some of the QHP potions I didn't need before. 
When Adiantum finally drops, the starting NPC Inspecter Adler will appear shortly in the center of this room. Talk to him one last time to recive your final rewards. He gives you a scroll of escape (to leave the instance immediately) and two special pieces of jewelry in addition to adding some Vitality back. All the times I did this quest I had full Vitality to start. But other people report going from Zero vitality to full level 4 vitality by doing the Pailaka quests. The jewelry is not dropable, enhanceable or tradable. Nor can you crystalize it. It has mid-high C grade mdef although it is only D grade itself. The only real notable benefit of it, is a minor boost to MP on each piece. He also takes away all the special pailaka items you may have left over as well as the special dualsword. You also get an additional 810,000 XP and 50,000 SP. I gained 1 full level, going from L40 to L41 completing this quest. 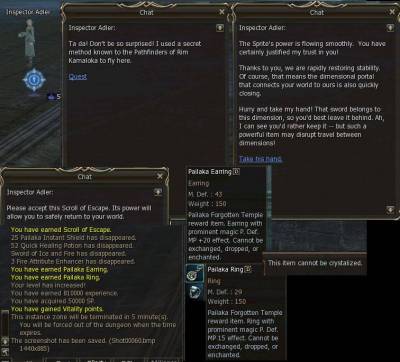
And for those of us who do better with visual aides, here is a very rough map of this instance. I only give mob numbers per room as they do move around, and all the mobs are very similar in strength and attacks. The one exception, the Bloom mob is noted on the map. The lootable items are placed roughly where you should find them as are the boss mobs. 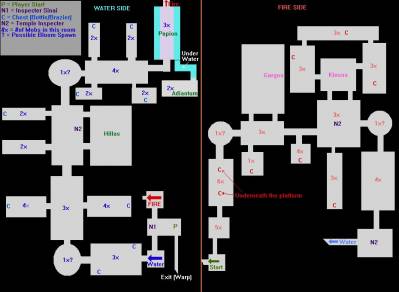
Source: http://l2vault.ign.com |